@Output Decorator in Angular
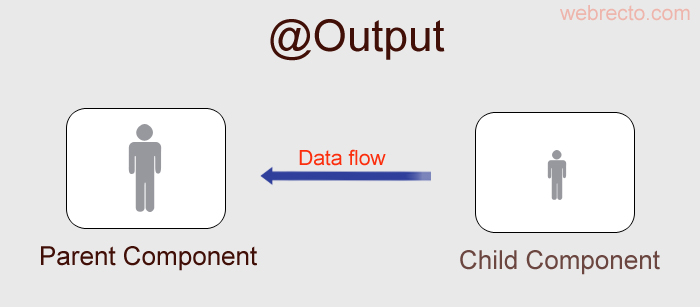
In this article, We will learn, how to send data from child components or directives to parent component with the help of @Output decorator. The @Output decorator is part of the angular core library and it is imported from the @angular/core module.

What is @Output Decorator Angular
The @Output decorator is a special feature of the angular core library. The decorator allows for the sharing of data from the child component or directive to the parent component. The @Output decorator plays a responsible role in communicating between them. It binds a property of the type of angular EventEmitter class.
It is used to emit events from the child component or directive to the parent component. The @Output decorator declares a data-bound output property, which Angular automatically updates during change detection.
Syntax
Child component
@Output() myOutputInfo = new EventEmitter();
In Parent component
<student-info (myOutputInfo)="showInfo($event)"></student-info>
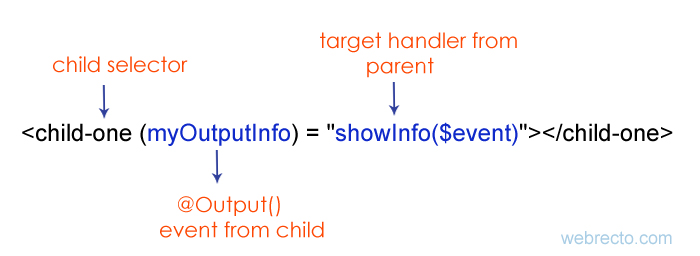
@Output decorates the property as the output property. We initialize it as an EventEmitter. The child component raises the event and passes the data as the argument to the event. The parent component listens to events using event binding and reads the data.
EventEmitter
EventEmitter is an angular class. It is imported from the @angular/core library. EventEmitter invokes the parent component method from the child component. The EventEmitter is responsible for invoking the event. The @output property is of type EventEmitter. The child component uses the emit() method to emit an event along with the data.
//Define output property
@Output() myOutputInfo = new EventEmitter();

//Invokes the event using the emit method.
addStudentInfo(value: string) {
   this.myOutputInfo.emit(value);
}
The different parts of the EventEmitter in the component:
@Output(): @Output() is a decorator function.
myOutputInfo: The name of the @Output().
EventEmitter
new EventEmitter
Add the Output Decorator to a Child Component
1: First of all, I created one child component in the application and imported Output and EventEmitter from the angular core library.
import { Output, EventEmitter } from '@angular/core';
2: In the child component, we declare an Output variable myOutputInfo for the collect user information. The myOutputInfo variable is an EventEmitter, that allows you to inform another component when an event happens.
export class StudentInfoComponent {
  @Output() myOutputInfo:EventEmitter= new EventEmitter();
}
3: I am using the "myOutputInfo" event emitter inside the addStudentInfo() function. When the user clicks on the button, the child component will send this event to the parent component.
addStudentInfo(value: string) {
        this.myOutputInfo.emit(value);
   }
The emit() is the method of EventEmitter class that emits event payload.
In the child component, we have two controls, one is html input element and the other is the button element. In the HTML <input> element, I am using template reference variable #newName to store info that the user types into the text box.
<label for="item-input">Add an Student Name:</label>
<input type="text" #newName>
<button type="button" (click)="addStudentInfo(newName.value)"></button>Add Studentst</button>
In the second element button, the click event is bound to the addStudentInfo() method. The method takes as its argument the value of the #newName value property.
Send Data From a Child Component to a Parent Component

In my demo application, the app component is the parent component. I am adding a child component inside the parent component to pass data from the child component to the parent component.
1: In the child selector, The myOutputInfo is a custom event. When this event is invoked, showInfo() methods are executed.
<child-one (myOutputInfo )="showInfo($event)"></child-one>
2: After declaring the custom event and parent method in the child selector, we call the showInfo() method in the parent component and read the child component data in the template.
export class AppComponent {
  studentName: any = [];

 showInfo(newName: string) { // student name will come from child component
  this.studentName.push(newName);
 }
}
3: We can display the student's name in the parent template.
Student Name is: {{studentName}}
Complete @Output & Eventemitter Example
In this example, we will create a complete demo with the help of @Output and Eventemitter. Here we will create one parent and one child component for communication between them. The app component is the parent and the student is the child component.
1: We create a student component for adding a student name. In this component, we create one input text box and one button for saving student names. In the input text box, I decorated #newName property for the holding user to enter the name. In the button, I bind click event for sending input data.
student.component.html
<h3>Child component</h3>
<h4>Student information</h4>
<div class="box">
   <label>Add Student Name: </label>
   <input type="text" #newName>
   <button type="button" class="button" (click)="addStudentInfo(newName.value)">Add Student</button>
</div>
2: I imported @Output and EventEmitter from the angular core library. We declare the @Output variable in the StudetntInfoComponent class and here we call the template method to emit the @Output variable.
student.component.ts
import { Component, Output, EventEmitter } from '@angular/core';

@Component({
 selector: 'student-info',
 templateUrl: './student.component.html'
})
export class StudentInfoComponent {
   @Output() myOutputInfo = new EventEmitter();
   constructor() { }

   addStudentInfo(value: string){
    this.myOutputInfo.emit(value);
   }
}
3: We create a parent component and inside the component add a child component selector. In the child selector, we bind the @Output variable and parent method for the use of child data in the parent component.
app.component.ts
import { Component } from '@angular/core';

@Component({
 selector: 'app-root',
 styleUrls: ['./app.component.css'],
 templateUrl: './app.component.html'
})
export class AppComponent {
 studentName: any = [];

 showInfo(newName: string) {
   this.studentName.push(newName);
 }
}
app.component.html
 <h2>@Output decorator example:: webrecto.com</h2>
 <h4>Parent component</h4>
 <div class="box">Student Name is:
     <ul>
       <li *ngFor="let student of studentName">{{student}}</li>
     </ul>
 </div>

 <student-info (myOutputInfo)="showInfo($event)"></student-info>
app.module.ts
import { NgModule } from '@angular/core';
import { BrowserModule } from '@angular/platform-browser';
import { AppRoutingModule } from './app-routing.module';
import { AppComponent } from './app.component';
import { StudentInfoComponent } from './student/student.component';

@NgModule({
 declarations: [
   AppComponent,
   StudentInfoComponent
 ],
 imports: [
   BrowserModule,
   AppRoutingModule
 ],
 providers: [],
 bootstrap: [AppComponent]
})
export class AppModule { }
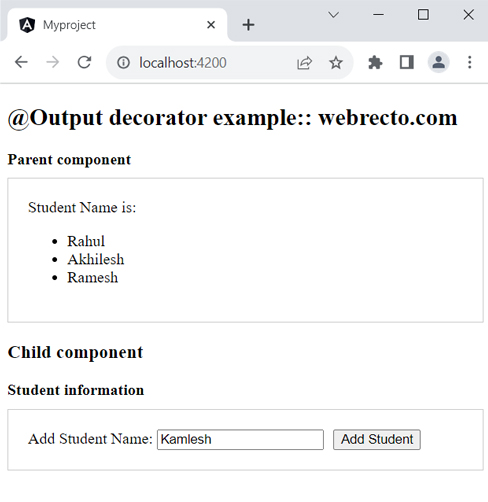
Find the print screen of the output.

